


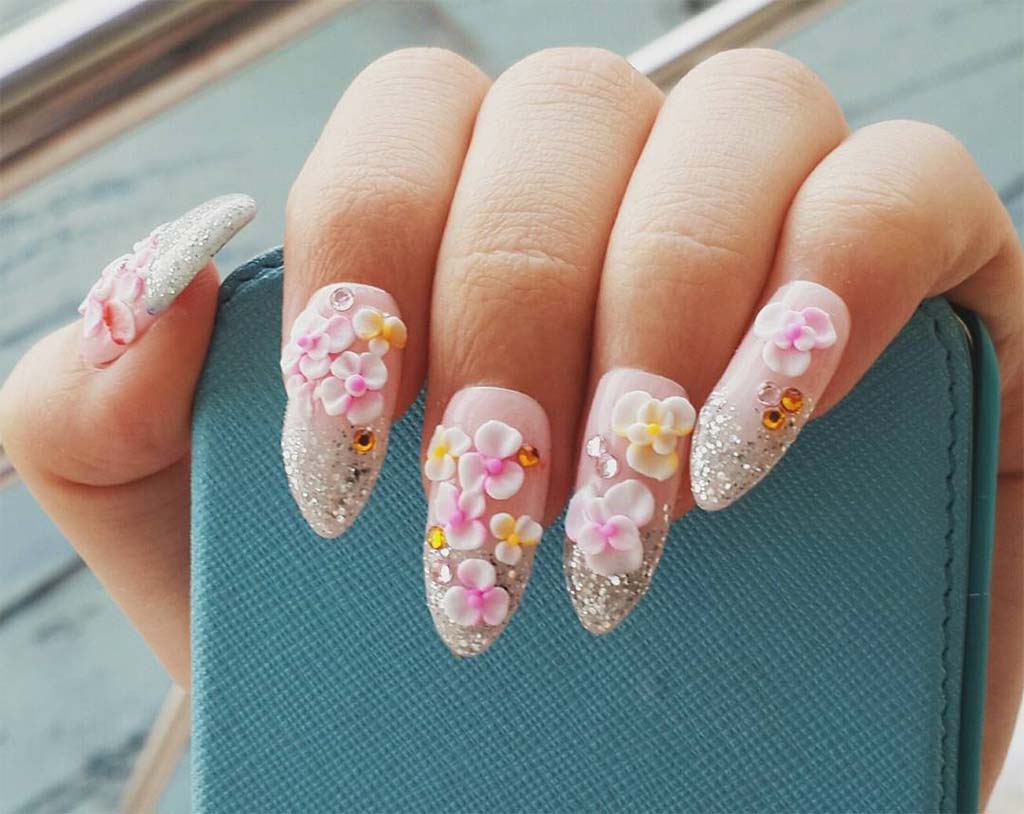
It’s beautiful to see in its finished form. And it’s mesmerizing to watch someone sculpting it. If you want to know how to do 3D rose nail art, it’s best to learn by practicing it. Although your first attempts at 3D nails may not turn out perfect, in time you’ll get the hang of it. All you need are a few supplies and some patience to try.
What You Need to Do 3D Rose Nail Art
The simplest solution might be an acrylic nail kit. Young Nails has a comprehensive acrylic kit with everything a professional nail artist needs to do 3D roses and more. It comes with essentials like:
- Monomer liquid
- Acrylic powder
- Protein bond
- Acrylic brush
- Nail wipes
- Nail brush
- Nail forms
- Glass dappen dish
And so much more even down to nail wipes, cuticle oil, nail files, acrylic tips, and adhesive. It’s quite a steal for the price!
Remember that if you sculpt acrylic extensions, you’ll need a coarse grit file or a nail drill to shape them as acrylic is very hard. A drill is also best for removing acrylics.
Check if the kit you get comes with only sample-sized bottles of monomer and tiny jars of powder. Chances are you’ll need much more than what’s included as you learn how to do 3D flowers. The monomer isn't just for nail art but it is also necessary for cleaning your brush.
There are all sorts of acrylic powders to choose from, whether you want clear or nude colors, vibrant shades, or glitter powder.
Once you have all the supplies, set up in a place with good ventilation, and let's get to work!
How to Do 3D Roses on Nails
The experts say it's wise to experiment on a training hand. It's like a mannequin hand for nail artists to practice on. The reason is that acrylic monomer can irritate the skin and cause permanent allergies. It's a good bet that your first few tries will color outside the lines so practicing on another surface instead of your finger is smart.
First, prepare the nail by trimming, shaping, and pushing back the cuticle. Remove the natural shine from the surface and apply an acid-free nail primer. This may be called "protein bond and primer.” It removes the excess oil and moisture from the nail to improve adhesion.
Second, pour some of the monomer into the dappen dish and transfer some of the acrylic powder into a separate dish. This is better than dipping your brush into the jar and contaminating the rest of the powder. Unless you've chosen a low-odor monomer, the smell will be quite strong. It's best to work near an open window or in a well-ventilated spot. Remember that acrylic will dry faster in warmer temperatures. The quicker it dries, the faster you'll have to work.
Third, practice making a bead. This means dipping the brush into the liquid and pressing it against the side to remove the excess. Run the brush through the powder to create a small damp ball at the tip of the brush. This part actually takes some practice. The little ball needs to stay on the brush, not drip off. If it’s not right, wipe it off on a paper towel and try again.
Fourth, put the moist ball on the nail and flatten it a bit to begin sculpting the rose petals. Use very small strokes pulling in the same direction, not back and forth. Use the side of the brush to help you shape the flower. Remember that you'll be adding a little bit more acrylic each time to build up the flower. You don't need to shape the first ball into a rose by itself. Instead, it's the process of building the rose from the bottom up. This video will help you visualize it.
Once you’re satisfied with the rose’s shape, let the acrylic dry. This takes about 10 minutes. If you’re not sure if it’s ready, gently tap it with the handle of your brush. If it clicks, it’s done.
Feel free to embellish the roses with polish or gems.
Alternative Methods for Doing 3D Rose Nail Art
If you’re intimidated about sculpting the rose directly on the nail, that’s okay. Practice with the acrylic on top of a paper nail form or palette. You can use nail glue or gel adhesive to attach the acrylic roses to the nails once they are dry.
Also, instead of sculpting acrylic roses, you can paint and encapsulate 3D frozen roses with builder gel and gel polish. Here’s a video demonstration.
The advantage of using poly gel or hard gel for sculpting the roses is that there’s no strong odor and it’s not as harsh on the skin as acrylic is. What’s more, it won’t dry until you cure it under a nail lamp. That fact gives beginners lots of time to perfect the shape and wipe it off and start over if needed. You might also be appreciative of the encapsulated design since it won’t snag on clothes.
Finally, let’s be realistic. The folks you see doing 3D roses in videos have had lots of practice. Your best efforts might not turn out the same until you’ve put in a few hours of work. If you’re in a hurry for 3D floral nails, you have other options to explore.
For example, it’s easy to add nail charms or dried flowers to your nails. You can stamp your nails with embossing gel in the shape of roses. It’s also possible to go beyond simply adding stickers to encapsulating them for a 3D look with builder gel or acrylic. Really, imagination is the limit!
Conclusion
We hope you have a blast learning how to do 3D rose nails. Watch out – you might become the nail artist in residence for your family and friends!
If you want to see what’s new and trending for nails, check out our new arrivals. We also have great deals to save you money on all your nail care necessities. Remember, we offer free shipping on orders over $100!


