



Nail Art Brush
Liner, detail and ombre nail art brushes for gel designs: LAVIS Kolinsky liners and double-ended brushes, LDS ombre fan brushes, 6-piece variety sets and dotting pens, 30+ tools in all. Free shipping on qualifying orders.
Learn More About This Collection
Nail art brushes: what this page covers
This page holds the small brushes and hand tools used for design work on top of a gel manicure: long liners for lines and lettering, short detail brushes for petals and tiny accents, ombre and fan brushes for soft gradients, plus a few tools that do the same jobs without bristles, such as dotting pens and a stamp pen. Acrylic sculpting brushes and dusting brushes live on other pages; here every tool is chosen for painting and placing colour in small areas.
Most of the range comes from LAVIS, whose single brushes use natural Kolinsky hair on a long handle, sold one tip shape per listing so you can replace only the size you wear out. Around them sit LDS ombre brushes, budget synthetic singles numbered by tip shape, and 6-piece and 8-piece variety sets for a first art kit or a backup station.
Brush shapes and what each one does
| Shape | Example on this page | Best job |
|---|---|---|
| Short liner (9mm) | LAVIS Kolinsky Brush 9mm Liner | Fine accent lines, outlines, small lettering |
| Mid liner (15mm) | LAVIS Kolinsky Brush 15mm Liner | Longer curves, stripes, lace and web lines |
| Long liner (20mm) | LAVIS Kolinsky Brush 20mm Liner | Long continuous strokes across the nail |
| Detail point (Size #2) | LAVIS Kolinsky Brush Size #2 | The tightest detail and tiny shapes |
| Oval | LAVIS Kolinsky Brush Oval, double-ended Oval #6 or #8 | Petals, small fills, rounded strokes |
| Ombre / fan | LAVIS Kolinsky Brush Ombre, LDS Ombre Brush | Soft colour transitions and gradients |
| Smudge and filbert | Bamboo Gradient Smudge Brush, Bamboo Filbert Brush | Blending edges and gentle colour fades |
| Plaid | Plaid Brush | Crosshatch and plaid patterns |
The double-ended LAVIS brushes put two Kolinsky tips on one handle: Oval #6 with a 10mm liner, Oval #8 with a 20mm liner, or Oval #8 with a spatula end. One handle covers a fill shape and a line shape, which keeps the art station shorter.
Which brush to reach for, by design
- Line art, lettering and outlines: a short or mid liner. Thin liner gels and lace designs need a thin liner and a steady hand, so start with the 9mm or 15mm and keep the product load light.
- Spider and web lines: a fine liner or the stretchy gel itself; a light load keeps the line thin.
- Ombre and pat pat gradients: an ombre brush or a sponge, patted lightly over the area where the two colours meet.
- Flowers and 3D petals: an oval or detail brush for painted petals; for raised emboss gel flowers a dotting tool or small brush is enough.
- Bubble and bloom effects: a fine liner or dotting tool to poke and drag magic gel, wiped clean between every mark.
- Wave and sea foam looks: a liner glided once through wave gel on uncured top gel, then a second pass if the bloom spreads too far.
Painting technique with gel
- Prep and apply the base and colour as usual, then cure.
- Put a small bead of art gel on a palette rather than painting straight from the bottle, so the brush picks up only what it needs.
- Load the tip lightly; a heavy load spreads and blurs the line, which is why thin liner work calls for a light touch.
- Cure each section as you finish it so the next detail cannot drag through it.
- Wipe the brush on a lint-free wipe between colours, and clean it fully at the end of the service.
- Seal the design with top gel and cure.
Pro tip: for magic gel, the tool has to be clean before every poke. Residue on the tip muddies the bloom, so wipe it each time and cure as soon as the pattern looks right (30 to 60 seconds under LED, 60 to 90 seconds under UV for magic gel).
Kolinsky hair or synthetic
The LAVIS single brushes and double-ended brushes use natural Kolinsky sable hair on a long handle, the hair LAVIS chooses for control in detail work. The numbered value brushes (#05 Round Head, #07 Sweep) and the 6-piece sets use synthetic bristles and are listed for gel polish, acrylic paint and watercolour. A sensible setup keeps one or two Kolinsky liners for client-facing line work and a synthetic set for colour mixing, glitter and messy effects that wear a brush out quickly.
Sets and value singles
- LAVIS Artist Nail Art Brushes: sold as the full set or as single variants (Art Brush 1 to 3, Linerwork 1 and 2, Detail), so you can replace one shape without buying the box again.
- 6-piece variety sets: green, pink multi-tip, gradient blue and colourful handle versions, each with six tip shapes for a starter kit.
- 8-piece Aurora painting brush set: a second multi-brush option for a backup station.
- Numbered singles: low-cost synthetic brushes named by tip shape, handy as spares.
Prices are shown on each listing and stock changes daily, so check the product page before planning a large order.
Tools that work alongside brushes
Some nail art is faster without bristles. The 5-in-1 Dotting Pen has five tip sizes for dots, chrome rub-down and small accents. The Nail Art Stamp Pen transfers patterns from a stamping plate onto a cured base, and the stainless steel sculpting tool has a double tip for acrylic sculpting and carving. Gels with a built-in cap brush, such as the LDS line art gels, need no separate liner at all for simple lines.
Cleaning and storing art brushes
- Clean after every service with a cleaner made for gel brushes; LAVIS Brush Cleaner Gel is made for natural and synthetic hair.
- Reshape the tip with your fingers while it is still damp so the point dries straight.
- Store brushes flat or bristles-down with the cap on, away from the lamp, so stray light cannot cure gel left in the hair.
Building an art station
A practical art station starts with three brushes: a short liner, an ombre brush and a dotting pen. Add a mid or long liner when clients start asking for lettering and long lines, and a double-ended oval and liner when floral work becomes regular. Pair them with line art gels and pat pat gels so every brush has a product it was made for, and keep stamping plates nearby for clients who want a full pattern in one step.
Related collections
Related reads


LAVIS Double Ended Oval #6 + 10mm Liner — Two-in-One Detail Tool
Choose your option

LAVIS Double Ended Oval #8 + 20mm Liner — Two-in-One Detail Tool
Choose your option


LAVIS Artist Nail Art Brushes — Premium Multi-Brush Set
Choose your option


6-Piece Gradient Blue Handle Nail Art Brush Set — Variety Pack
Choose your option


Stainless Steel Sculpting Tool — Acrylic sculpting
Choose your option


Bamboo Gradient Smudge Brush — Gradient smudging
Choose your option


Nail Art Stamp Pen — Stamping precision nail art patterns onto cured base
Choose your option


#05 Round Head Brush — Nail Art Tools & Accessories
Choose your option


5-IN-1 Dotting Pen — Chrome Application Tool
Choose your option

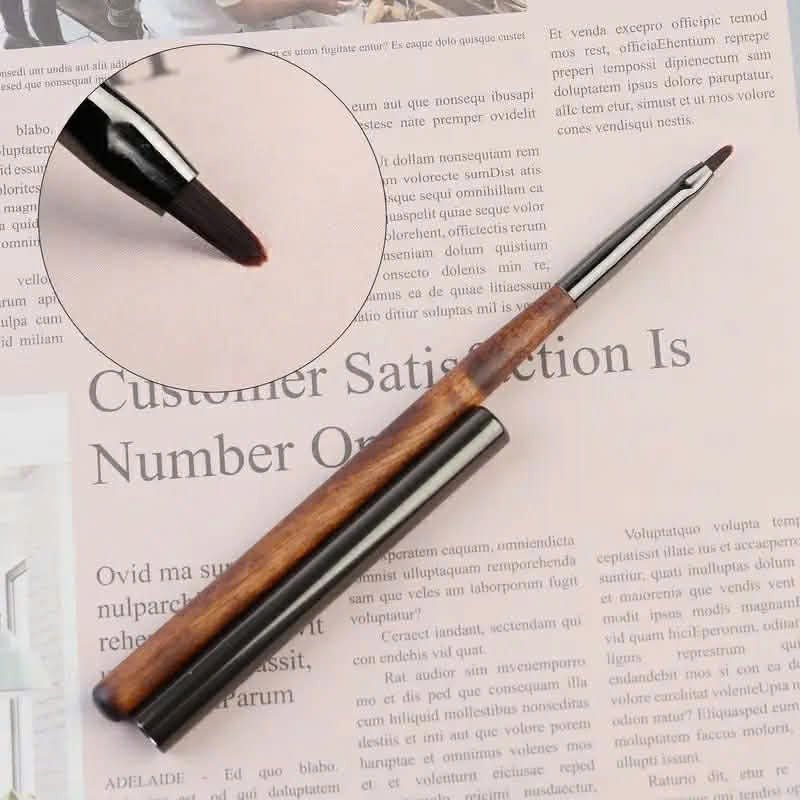

Bamboo Filbert Brush — Rounded oval-tip detail
Choose your option

LAVIS Kolinsky Brush Ombré — Premium Sable Hair Nail Art Brush
Choose your option

LAVIS Kolinsky Brush Oval - Tools & Accessories
Choose your option


LAVIS Kolinsky Brush 9mm Liner — Premium Sable Hair Nail Art Brush
Choose your option


6-Piece Green Nail Art Brush Set — Variety Pack
Choose your option


