


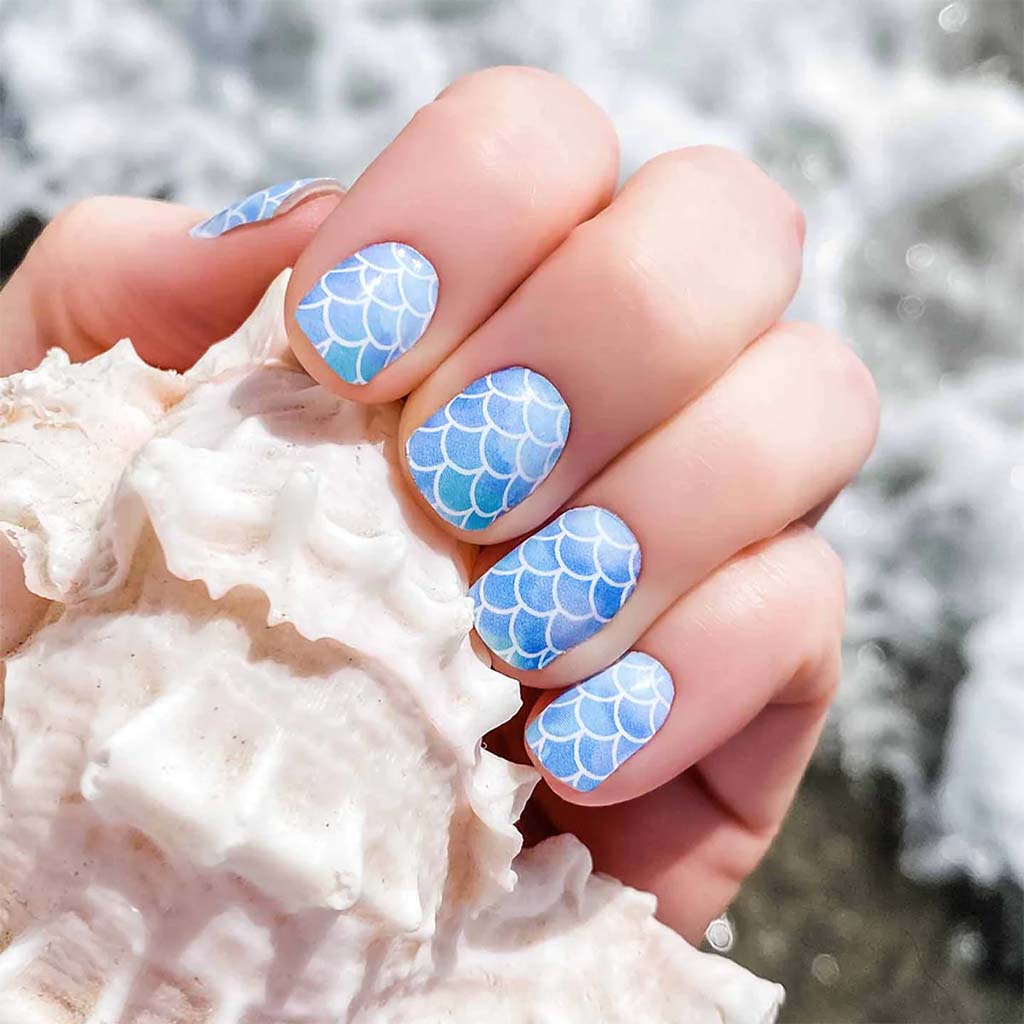
Mermaid nails are a playful way to add some magic to your manicure. Creating the perfect mermaid look can be a breeze, even if you're a beginner nail artist. All you need are the right tools and techniques.
In this article, we'll go through the steps to do mermaid nails for beginners. These include selecting polish colors, adding scales, and applying glitter and accessories. Soon you’ll be making a splash with a stunning mermaid-inspired look! Let’s dive in and get started.
What Are Mermaid Nails?
Mermaid nails can be as simple as a single color with an iridescent or pearlescent finish. You can create that with nail polish like OPI’s Angel’s Flight to Starry Nights or Essie’s Geek Chic. Rimmel even has one called Mermaid Fin. But we suspect you want something that’s even more dazzling.
If you really want to have a memorable manicure, you’ll need a few extra tools. For example, you can use black polish to hand-paint or stamp mermaid fish scales onto the shimmery finish.
Or add tiny seashells, starfish, pearls, or rhinestones.
Mermaid nails are versatile. Let your creativity out to play!
Supplies Needed for Mermaid Nails
You can do mermaid nails with nail lacquer, gel polish, dip powder, or acrylics. However, lacquer and gels are easiest for beginners. Here's a shopping list for regular nail lacquer, followed by one for gels.
Mermaid Nails with Lacquer
Nail lacquer is just regular nail polish. It air dries and wipes off in seconds with acetone when you want to remove it. Therefore, gather up your favorite marine shade, like Ocean Blue, plus black polish if you add fish scales. If you have a sheer, shimmery polish, you can use that as a top coat. Or even better, use a fast-drying lacquer to make your hard work look fabulous for last longer.
Mermaid Nails with Gel Polish
Gels take a little more work because you’ll need base and top coats, colored polish, and a nail lamp to cure them. It’s also helpful to have a thin nail brush if you add details like fish scales. Moreover, you’ll want gem sealer to glue on rhinestones, shells, or pearls.
Steps for Doing Mermaid Nails
There are many different ways to get the classic mermaid look. But no matter what kind of polish you’ll be using, the first step is to prep your nails.
Nail Prep
Trim and shape them and push back the cuticles. Use a fine grit file or buffing block to barely take the shine off the surface. Then wipe them with rubbing alcohol or acetone and a lint-free wipe to remove debris and oil. These steps are essential so the polish adheres properly and everything looks Insta-worthy when you’re done.
Let's split up the directions according to the polish you'll use.
Creating Mermaid Nails with Nail Polish (Lacquer)
If you’re using a base coat, apply it first and make sure it’s dry. Each coat of polish takes anywhere from a minute to up to seven minutes to dry before you can add the next. It depends on the room temperature and humidity. You can speed things up with a fan or a hair dryer set on a low, cool setting.
- Apply the colored polish. Add as many coats as you want to make the color as opaque as you wish.
- If you want to add fish scales, you can draw them with a thin brush or a toothpick (which is more challenging to control). However, you can also stamp them by painting the polish on a stamp and pressing it on the nail. It's even possible to use a piece of fishnet stockings! And lastly, there are stencils with scale patterns, too.
- Finish with an iridescent or pearlescent top coat. If you can't find one you like but have a shimmery polish that's too opaque, there's an easy fix. Blend 3 drops of clear polish with one drop of glitter polish and try that instead.
Making Mermaid Nails with Gel Polish
If you don't mind a few extra steps, working with gels is the easiest way to do mermaid nails. You can get impressive results!
- First, apply the gel base and cure it. Please don't skip this step; it protects your nails and helps your manicure last longer.
- Then apply the colored polish. You may want more than one coat to deepen the color. It’s easy to do ombre mermaid nails with complementary colors. For example, the LDS Mermaid Cat Eyes gels have a stunning shimmery finish that you can customize with a magnet. Check out this video to see how it works. Moreover, DND also offers a mermaid collection with brilliant shimmery colors. But we're most in love with the iridescent pastels of the collection below:
LDS Pearl CE Set - Pearl Veil Cat Eye Collection
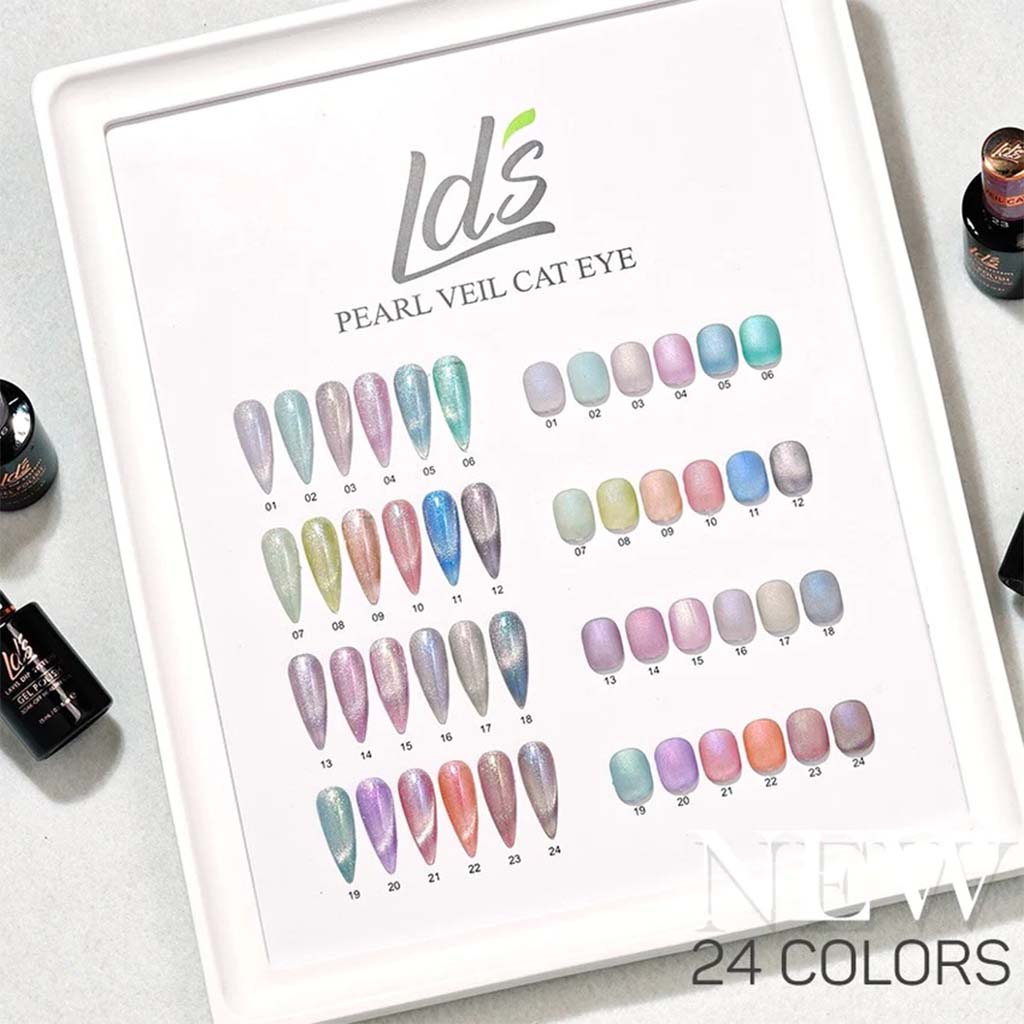
You’ve never seen anything like these enchanting shades worn by mermaids under the sea. They are easy for beginners to apply and beloved by pros. What’s more, the polish is low-odor and non-toxic. The cruelty-free formula lasts for up to 28 days.
- Once you’re satisfied with the colored polish, it’s time to add scales or other details. You can stamp the pattern or hand-paint it with a line art gel.
- Then include other mermaid-inspired elements like chunky glitter, seashells, or pearls. Although you can stick them onto the gel polish and then cure it, they will adhere longer if you use gel-based adhesive. You can cure it in the nail lamp just like polish and soak it off with acetone.
- Finish with a glossy top gel to make the colors more vibrant and prevent chipping and peeling. Or go with a glittery finish like this:
LDS 07 Ocean in Dream - Gel Polish Aurora Top Coat
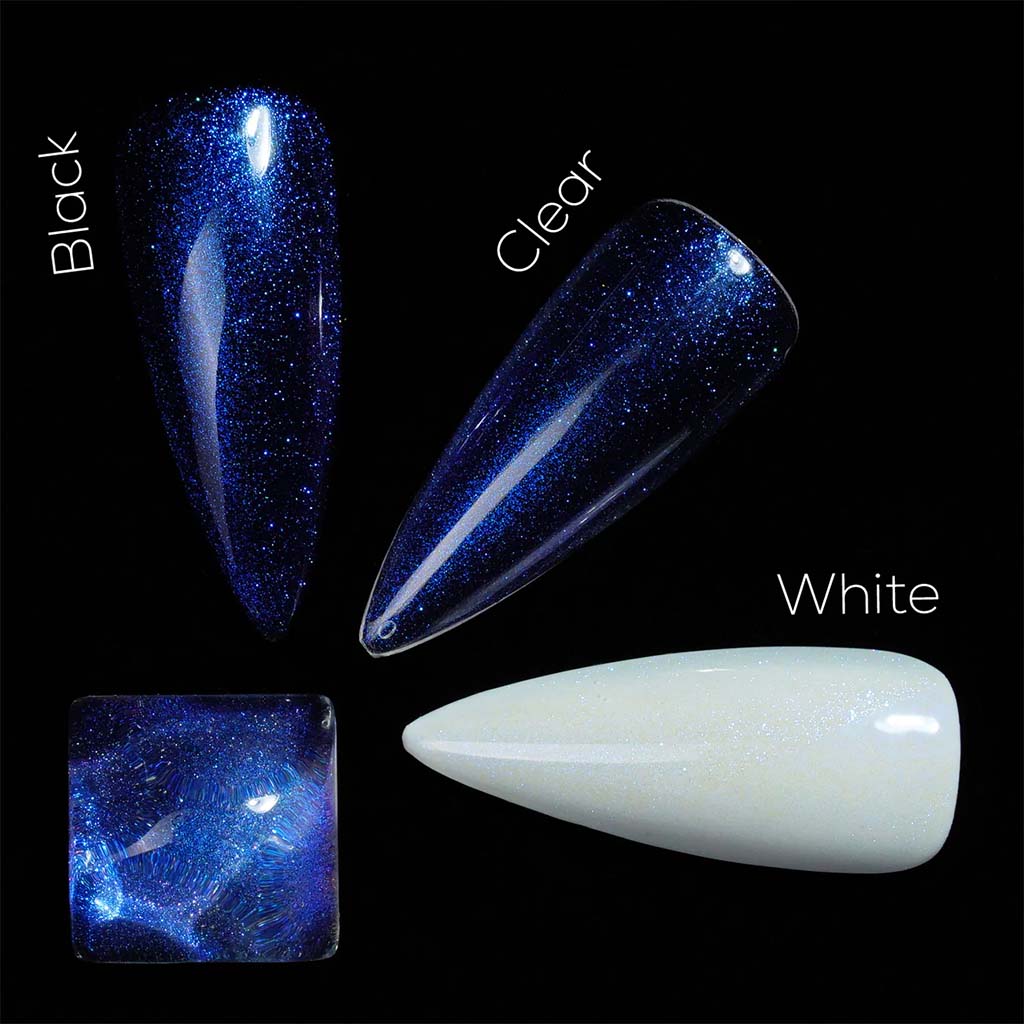
This is no ordinary transparent top coat. It offers different effects depending on the color underneath. Each one will have a lovely sheen of glitter that lasts for weeks. You can also apply it as a one-step polish.
Conclusion
We hope your mermaid nails turn out marvelous! Have fun with this creative, versatile nail trend.
While you’re here, we invite you to take advantage of our deals and enjoy free shipping on orders over $100.


