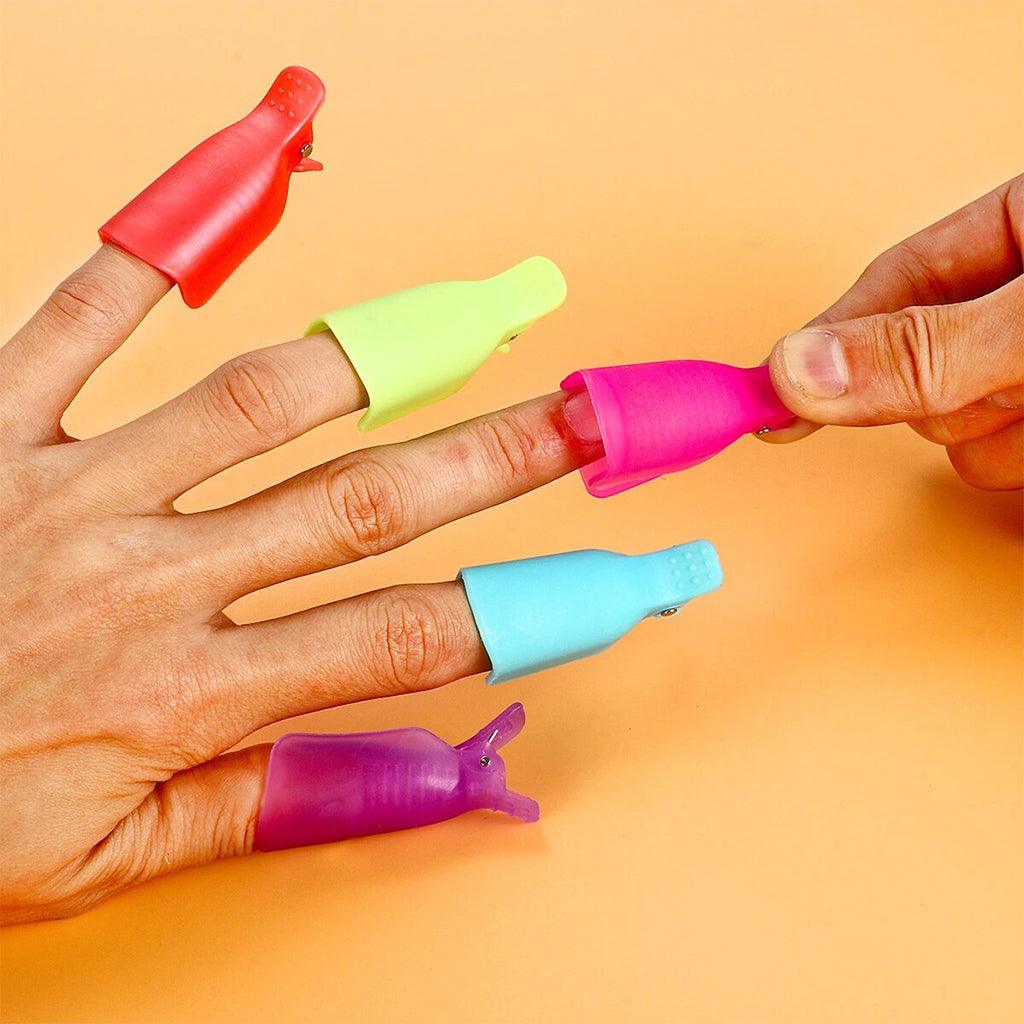
The Easiest Way to Remove Gel Nails
In many recent years, the nail beauty has undergone major changes due to the development of modern life. That’s why gel nail is more and more popular with almost girls all over the word. So what do you think about gel polish and why do we have to remove gel in a right way? In this post we wil help you guys find out what is gel polish and the easiest way to move gel nails.
What is Gel Nail Polish?

Gel is a substance similar to jelly. After applying nail polish, we are dried very quickly by ultraviolet (UV) light generators or led lights. If you want a gel manicure, you have to follow 3 basic steps: Base, topcoat and style or optional stone.
Without a doubt, they are a great alternative and there are many women who have had beautiful nails just because of this technique. However, as with any cosmetic procedure, we must weigh the pros and cons that may exist, in order to know what is most advantageous for us.
Gel nail polish has the ability to last longer, glossier than regular nail polish. It helps you to have beautiful, shiny hands for at least 14 days to 1 month, you do not need to worry about cracked nails when washing hair, washing dishes or washing clothes.
Why Do We Have to Remove Gel in a Right Way?

As mentioned, gel polish has a wide range of colors, high gloss and durability. However, if you do not know the origin of the gem nail polish you use, you will face unnecessary cases for your real nails and health.
The cases that customers often suffer from are chipped nails, worn, fragile nail surfaces and even the worst cases scenario is nail fungus.
Because of the high durability of gel nail polish, it cannot peel off on its own easlily. The process of removing gel polish is ussually called "breaking gel" because of its features, after incubating with nail gel remover, if the gel nail color is still peeling off, the nail technicians have to use a nail drill or tools to scratch this gel layer out. But this can cause damage to the nail surface also the skin around your nail and under the nail. Up to now, have you known why we have to remove gel nail in a right way yet?
If you remove the gel nails properly, you will limit most of the risks when doing gel nails and minimize the situations, actual nail damage. Here we will show you how to use the gel nail clip set!
What is Nail Gel Clip Remover?

Gel Breaker Clip set of 10 is a tool in the nail care set commonly used in curing and removing nails with gel nail polish or hard, powdered gel foundation. The product is an alternative to the method of incubating and removing nails with foil, for beginners as well as professionals in nail salons.
The product has a finger shape with high suction to prevent outside air from entering the nail and support the nail removal process more effectively.
Uses: soften the gel polish for easy removal from the nail surface, use with nail polish remover (eg acetone...) and cotton balls.
The 10 pieces gel nail remove clip is a new product on the nail market but very convenient, customers can remove the nail incubation very quickly and tightly without being exposed.
How to Use Nail Gel Remove Clip?
After a period of manicure, we want to break the old nail layer, then we will use nail clippers to remove the nails combined with water to remove the nails and cotton. First we use a grinder or a file to grind through the glossy layer on the real nail with gel polish, if it is a hard gel, then grind a bit more carefully, about 1/3 or 2/3 of the gel layer, powder and cut the length of the nail. if the false nail is too long. After that, we cut a small piece of cotton suitable for the size of the real nail, then dip it in the nail incubation water with a sufficient amount. In case there is no water to remove the nails, we can replace it with acetone combined with gel cleaning water in the appropriate ratio to remove the nails. Next, fold the upper part of the incubation clip upside down, then put the cotton pad that has been soaked in incubation water in the middle, and finally put your finger in the clip so that the nail surface is in direct contact with the cotton surface. Just like that, for the remaining nails do the same. Wait for about 5-10 minutes for the amount of water to remove the nails to absorb and penetrate deeply into the gel layer, for hard gels or powders, we will incubate longer because this layer has a thicker thickness. Finally, we pull out the nail and use an effervescent stick to push out all the gel and powder on the nail surface, use a smooth float to float the nail surface, then apply a nourishing oil to restore the nail or continue to decorate the new nail.
Note when using nail gel remove clip!
- Store the product in a cool, dry environment.
- During the incubation process, squeeze the clamp tightly to the nail, avoiding opening for air to get inside.
- After removing the nail, we should use a nourishing oil to restore the nail.
Final Thought
Hope this article was useful to you. With the above information, you must have found yourself the best solution when doing gel nails, confidently shine and design the most unique nail designs this summer, girls!
