


Dip powder manicure is a healthy option, and this can be used in place of a gel manicure. This is because it is odorless and does not need a UV/LED lamp, which is the best of all as it is long-lasting and flawless. In the wake of the Covid-19 pandemic, and the stay at home order, you need to learn how to apply a dip powder manicure at home. After all, you should look good despite staying at home for most of the day. Read up on this informative article on how to apply dip powder at home.
Things needed
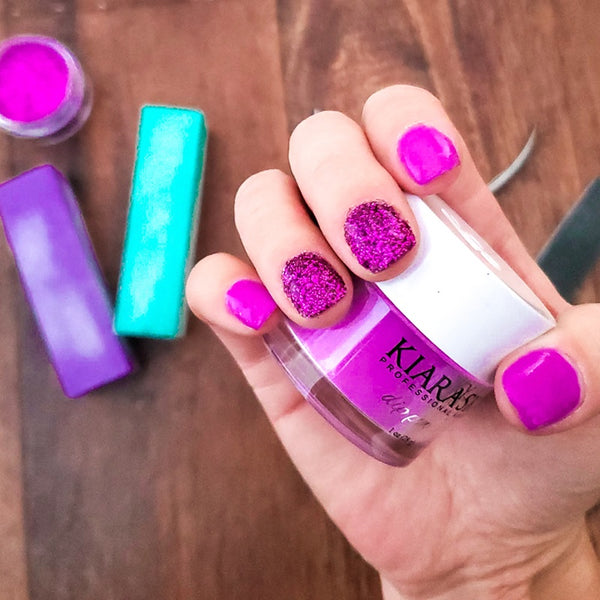
Your chosen dip powder colors
Nail care buffer
1 top layer
1 foundation/ base coat
Emery board nail file
Guidelines
Step 1: Nail clean up
In case you have a varnish on your nails, you can use an acetone-free nail varnish cleanser as well as a cuticle pusher to carefully clean your cuticles backwardly.
This process creates a chance for new nails to grow which indicates long-lasting nail care before filling.
Step 2: Nail file
After cleaning the varnish on your nail, then use a nail file to scrape the top surface of your nails by using a nail care block or nail drill to have a smooth surface before applying the nail powder.
Step 3
Scrape away any distractive area of the nails, check your nail side for any injured or damaged edges. Also if you have formal dip nail care to fill then properly check for any swollen part by using a coarse 180_100 grit nail file for this area.
You can also shorten the length of your natural nails and also file nail edges while you want to apply nail tips to have long nails.
Step 4
Purify your nails with alcohol, soak paper towels with alcohol or probably use nail sanitizer. You can also use anti-bacterial spray or a cleared filled sanitizer container to purify your nails.
Procedure: Rub the alcohol-soaked towel over your nails and fingers starting from knuckles to your cuticle and nails, this process energizes your nails surface to prevent it from bacteria or Grimes.
Step 5
While applying tips on your nails, you must get nail tips that will cover more than a third of your nail bed, each tip must get to the width of your nails and it must not overlap your nail epidermis.
Use a tip resin to wet the tips, gently hold each top firmly to the nail tips at a 45-degree angle for about twenty seconds.
Optional:Use a nail file for any adjustment to achieve a fitted nail if you don't have proper nail tip size, then pinch the tip side for a few seconds to stick the tips to your nail edges but while doing this avoid resin on your fingers.
Step 6
Scrape and file the tips: you can scrape away the tips edges and top surface to remove their shine then buff the nails all over again.
Step 7: Dip Powder application
The following steps must be followed.
While applying the dip powder on your nails you must apply a little stroke from 1/16 from the cuticle. Also to prevent swelling near the cuticle you must spread the powder out and let it sit on your nail for a minute.
Carefully and smoothly apply the resin on your nails using the brush application method. Since your powder will attach to this, ponder on having pure edges above the cuticle. However, you can apply a basin of resin if you are applying for natural nail care or your last nail care has been three to four weeks. You can also apply a desired thickness quantity of resin while doing fillings.
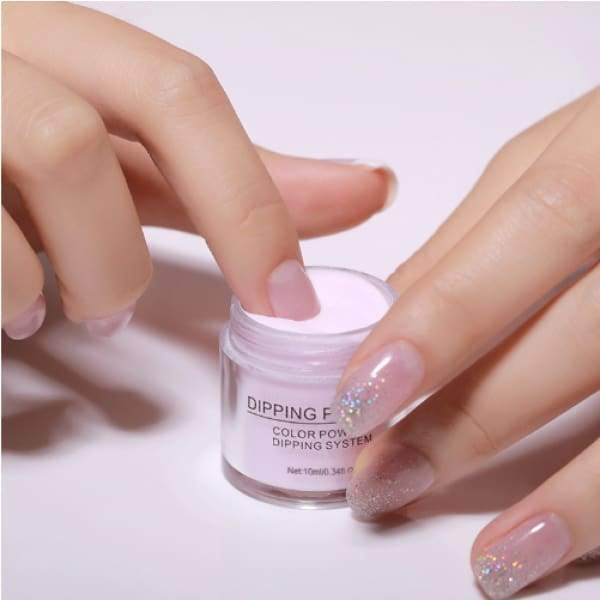
Firstly, you need to shake the sealed powder container before opening then use a nail rod to mix the powder. Then, use your finger to push the container to the front, gently roll your finger.
Put your fingers in the powder for five seconds, then take away your finger and Pat the pot edge. Use your other hand to tap the dipped finger to dust away excess powder from your finger. However, after your nail is patched, you can use a nail brush to clean the remaining powder and you must avoid using a colored powder for this process.
Now if you wish to use colored powder, by using more resins over the nails and the tips to smoothly and carefully varnish it.
Step 8: Ending and nail curing
Now you can apply your nail activators as you would apply on normal nail varnish then allow the activator and the second layers to stay on the nails for five seconds.
Shape and dull the nail by using a soft grid nail trimmer on the uncovered edges and nail sides.
End with a top coat: For this process, you can use an acrylic nail top coat then allow your nail to patch for two minutes. Then carefully rub your nails epidermis with cuticle oil and apply the extreme layers as you would do on natural nails.
Clean your hands: After patching your nails with a towel you can also use lukewarm water, hand cleanser, and a nail brush to clean your nail tips.
Maintain your nail care: Now you have long-term nails before refilling.
Although, there might be new nails growing near the cuticle area which may lead you to refill as early as two weeks after your dip nail care.
Notice:
While applying your nail varnish on the top of your nail care, make sure that it is far from your cuticle because it can affect the nail varnish by swelling up.
You must roll the nail varnish to mix it between your hands than shaking it to prevent the air bubbles from damaging the nails.
You can also choose to use cool air instead of lukewarm air but if you use a fan to patch your nails, then you have to use a blow patcher on the cool settings.
Reuse a pure top coat every few days to prevent chipping and also rub cuticle oil on to your nails every day if necessary.
Spread a little paper towel over your nail care surface for fast clean up.
Endeavor to use a pure nail varnish which will make the nails to be glowing and last long.
Tips
Although, hand sanitizer is too powerful and strong which can eat away your preventive top coat so you must use a mild soda to wash your hands.
Conclusion
Dip nail care is healthy tips to get proper nail care because the dip powder has no odor and it doesn't need an Ultraviolet lamp for nail care.


