



Spring → Summer 2026 — New Drops


Nail Supply Wholesale — 14 Top Brands. One Supplier. Your Salon Covered
Stock every brand your salon runs — Lavis, OPI, DND, A'DOR, LDS & more — one cart, one invoice, wholesale prices.


Find What Works for You
3 person. 3 pricing tiers,One supplier covering all of them.

Salon Owners
Stock 3 Months in 1 Order.Lock 90-Day Pricing.
Wholesale terms.Same-lot garantee.Msds standard.Bundle tiers $99/ $200/ $500+.

Nail Tech
Latest Cat Eye + Builder Gel + 1-min Service Savers.
OPI Intelli-Gel. LAVIS 9D Cat Eye. A'DOR HEMA-free. for Saturday's customer.

DIY Lover
HEMA-Free Safe. Salon-Grade. From $15.
Pregnancy-safe gel. Mom-daughter ritual kits.


Stock Your Salon — Tier Bundle Sets


SPECIAL: Buy LAVIS Cat Eye Collections: C14, C15, C16, FREE 1 Full LDS Fruit Cat Eye Collection
Choose your option


SPECIAL: Buy LAVIS Builder Gel in the Bottle Collection, FREE 1 Builder Gel-Clear, 1 Base & Top Gel, 1 Retractable Brush
Choose your option


Choose your option

Everything your salon needs - One Catelog


Top 10 SKUs This Month

Kiara Sky Gel Pro Polish - The Freshly Pressed Collection
Choose your option
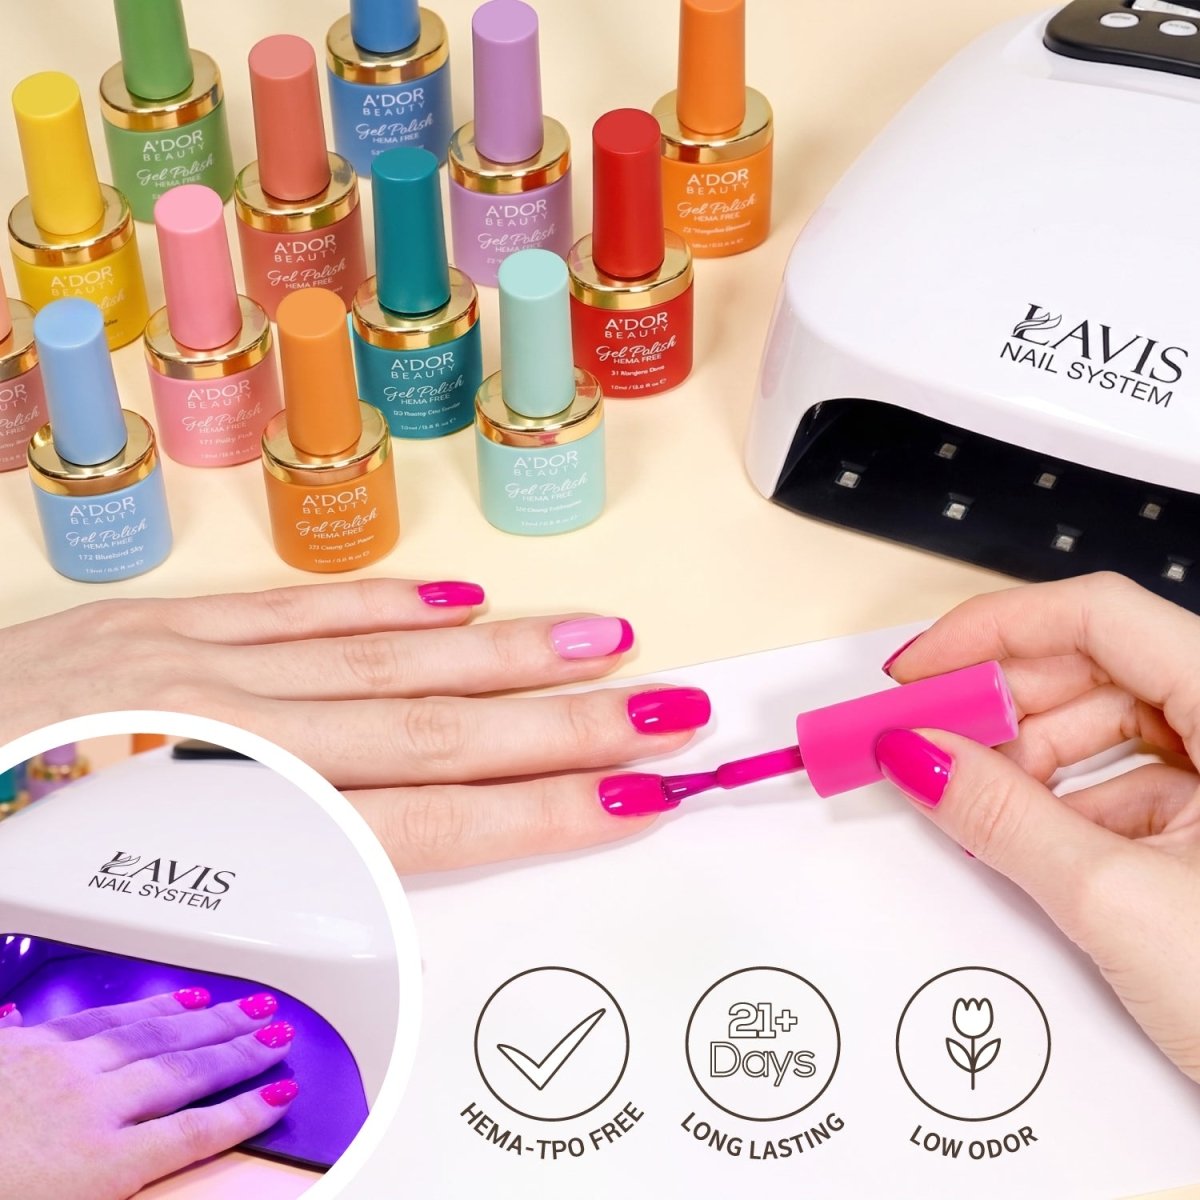
72 signature shades + new Color Me Gel-ous launch. Vegan. TPO-free. CA Prop 65 compliant.
- HEMA-Free + TPO-Free + Vegan — full line
- CA Prop 65 + MSDS + EIN + Batch # — compliance ready
The Only Full HEMA-Free Line in the US


A'DOR Color Me Gel-Ons Collection
74 Items


DND HEMA & TPO Free Gel & Lacquer Collection
297 Items


A'DOR Color Me Gel-ous Collection
66 Items


OPI Intelli-Gel | HEMA-Free & Vegan GelColor System
420 Items


Kiara Sky Gel Pro Spring Collection
11 Items


A'DOR HEMA-Free Gel Color Collection
145 Items
LAVIS BEST SELLER
9D · Smoothie · Unicorn · Creamy. CE1-CE18 + Ver2 + C-collections.


CE14 Cosmic Voltage Collection
13 Items


CE3 Tropical Candy Collection
13 Items


CE2 Under The Sea Collection
13 Items


CE5 A Breath of Spring Collection
13 Items


CE6 Prism Pop Collection
13 Items


C10 Light of Dawn Collection
25 Items


CE13 Moonlit Mirage Collection
13 Items


CE10 Beauty Bureau Collection
13 Items


CE1 Cozy Cashmere Collection
14 Items


CE9 Cabin Fever Collection
13 Items


CE17 Stellar Shift Collection
13 Items


CE18 Galaxtic Halo Collection
13 Items


CE8 Hidden Treasure Collection
13 Items


CE4 Fairy Tale Collection
13 Items


CE7 Villain Era Collection
13 Items


C09 Morning Dewdrop Collection
26 Items


C11 Mystic Veil Collection
25 Items


C14 Secret Garden Collection
25 Items


C13 Hallowed Solstice Collection
25 Items


C12 Candy Quartz Collection
25 Items


C16 Honey Eclipse Collection
25 Items


C15 Gilded Aura Collection
25 Items


CE11 Enchanted Spell Collection
13 Items


CE12 Crimson Frost Collection
13 Items


CE15 Fangtastic Collection
13 Items
NAIL ART


PAT GEL
22 Items


NAIL BRUSH
86 Items


A'DOR Metallic Marble Ink Collection
24 Items


3D Sculpture & Molding
45 Items


A'DOR Mirror Spider Gels
7 Items


Emboss Gel & Painting Gel
98 Items


Line Art Gel
97 Items


Nail Stamping Plate
32 Items


Chrome Powder
69 Items


Nail Foil
98 Items


Rhinestones
78 Items


Nail Stickers
175 Items


3D Nail Charm Mold
40 Items


Flakes & Foils
108 Items


Nail Art Glitter
96 Items


Design Accessories
99 Items


Nail sequins
41 Items



What Salons Say About DTK
✨ Summarized by AI from verified salon reviews.
4.8★★★★★from 2,000+ verified salon orders
What 2,000+ US Salons Say About DTK


Hannah Nguyen
“I’ve bought from DTK for 5 years. I don’t need PR. Just don’t disappoint me.”


Linda Nguyen
“Customer asked HEMA-free. A’DOR is now in every kit I sell.”


Sarah
“Saved $850 last year on DIY. Used it for therapy. Worth it.”
Wholesale Nail Supplies for US Salons & Home Studios
DTK Nail Supply is a US-based wholesale nail supplier carrying 14+ professional nail brands including OPI, DND, DND DC, Kiara Sky, SNS, NuGenesis, Chaun Legend, and more. Headquartered in San Jose, California. Free shipping over $100, fast US delivery, Net-15 terms for verified salons. Trusted by 5,000+ professional salons nationwide.
Learn More About DTK
About DTK Nail Supply
DTK Nail Supply is a US-based wholesale nail supplier serving 5,000+ professional salons across the United States. Headquartered in San Jose, California, we stock the full catalog of over 14 leading professional nail brands including OPI, DND, DND DC, Kiara Sky, SNS, NuGenesis, Chaun Legend, Lavis Nails, LDS Healthy Gel, A'DOR HEMA-Free, Mia Secret, and more. We ship same-day from our US warehouse on orders over $100 with free shipping included.
Why 5,000+ US Salons Choose DTK Nail Supply
Professional nail salons rely on DTK for three reasons. First, broad inventory — we carry the complete catalog of every major brand, not just bestsellers, so you can fill specific client color requests within 24 hours. Second, wholesale tier pricing with Net-15 payment terms for verified salon accounts, plus bundle discounts when ordering complete salon setups (essentials + colors + lamp + drill). Third, fast US fulfillment — same-day shipping from our California warehouse, US-wide delivery typically within 2-5 business days, free shipping on orders over $100.
Complete Salon Setup From One Supplier
DTK Nail Supply offers everything a professional nail salon needs in one cart: gel polish and nail lacquer in 5,000+ shades across leading brands, dipping powder systems (OPI, SNS, NuGenesis, Kiara Sky), acrylic powder and EMA monomer for nail extensions, base coats and top coats, prep liquids and primers, UV/LED nail lamps, e-file drills and drill bits, cuticle care tools, sanitization supplies, and nail art accessories. For new salon openings, ask about our turn-key starter packages that include everything needed to open day-one.
Customer Service That Speaks Your Language
DTK's customer service team is bilingual (English and Vietnamese), supporting both first-generation salon owners and US-born nail technicians. Reach us at info@dtknailsupply.com for product questions, bulk pricing inquiries, or Net-15 application. Explore our bulk savings collections or browse by brand to start building your salon kit today.
Frequently Asked Questions
What is DTK Nail Supply?+
DTK Nail Supply is a US-based wholesale nail supplier headquartered in San Jose, California. We serve 5,000+ professional salons across the United States, carrying 14+ leading professional nail brands.
What brands does DTK Nail Supply carry?+
DTK stocks the full catalog of leading nail brands including OPI, DND, DND DC, Kiara Sky, SNS, NuGenesis, Chaun Legend, Lavis Nails, LDS Healthy Gel, A'DOR HEMA-Free, Mia Secret, and more — across gel polish, dipping powder, acrylic, base/top coat, and salon essentials.
How long does shipping take from DTK Nail Supply?+
DTK ships same-day from our US warehouse on orders over $100. US-wide delivery typically takes 2-5 business days. Free shipping included on orders over $100.
Do you offer Net-15 payment terms?+
Yes. DTK Nail Supply offers Net-15 payment terms for verified professional salon accounts. Apply by contacting info@dtknailsupply.com with your salon business license and tax ID.
Can I order DTK products from outside the United States?+
DTK Nail Supply primarily serves the US wholesale market. For international orders, contact info@dtknailsupply.com to discuss shipping options and minimum order quantities.
Do you support bulk and wholesale orders for new salons?+
Yes. DTK Nail Supply offers tier pricing on bulk orders, bundle discounts for complete salon setups (essentials + colors + lamp + drill), and turn-key starter packages for new salon openings.
Does DTK Nail Supply support Vietnamese-speaking salon owners?+
Yes. DTK's customer service team is bilingual (English and Vietnamese), supporting both first-generation salon owners and US-born nail technicians. Contact info@dtknailsupply.com in either language.
BLOGS

Chaun Legend LG5001 Lactose Intolerant: The Sheer Milky White That Gives You Three Looks in One Bottle
Chaun Legend LG5001 Lactose Intolerant is a sheer milky white gel polish with buildablecoverage. One thin coat gives a translucent jelly finish; two coats deliver a classic milkywhite; three coats approach near-opaque. Soak-off, LED/UV cure, 15ml. Available atDTK Nail Supply as an authorized U.S. distributor. Most gel polishes do one thing. You pick a color, you apply it, you get that color. Chaun Legend LG5001 Lactose Intolerant works differently, not because of a gimmick, but because of how it is formulated. LG5001 Lactose Intolerant is a sheer milky white gel. That single characteristic, sheer, not opaque, means the number of coats you apply determines what look you get. One coat lands as a soft translucent veil that lets the nail bed show through. Two coats build into the classic milky white that has dominated social media nail content for the past two years. Three coats approach a near-opaque finish without the stark, chalky look of a traditional white gel. One bottle. Three different looks. That is the real value proposition of LG5001 Lactose Intolerant, and it is something the existing Chaun Legend nail polish lineup needed. Why Milky White Nails Became the Most-Requested Look in U.S. Salons The milky nails trend did not emerge from a campaign. It grew organically out of two converging aesthetic movements that took hold across social platforms starting around 2022 and have not let go. The Clean Girl Aesthetic The clean girl aesthetic, a style defined by minimal makeup, understated jewelry, and effortlessly polished grooming, created a specific demand in nail salons: clients wanted nails that looked expensive without looking done. Not the dramatic stiletto sets. Not the art-covered coffins. Something quiet that still communicated intention. Milky white nails became the nail equivalent of that aesthetic almost immediately. The sheer finish feels fresh and modern without demanding attention. The color is not white-white, it is warmer, softer, and more flattering than a stark opaque white would be. It complements the skin rather than contrasting with it, which is exactly what clean girl clients are looking for. The Old Money Aesthetic Running parallel to the clean girl movement was the old money aesthetic: quiet luxury, no logos, investment pieces over trendy items. In the nail context, old money translates to refined neutrals that suggest effortlessness. Milky white fits this perfectly, it is the color that says you had a professional manicure without needing to draw attention to it. These two aesthetics, both wildly popular in the U.S. market across multiple age groups, created consistent, ongoing demand for a technically excellent milky white gel. LG5001 Lactose Intolerant is built to answer that demand. The TikTok Effect on Salon Bookings Milky nails content consistently outperforms on short-form video. The reason is visual: the soft translucency catches light in a way that reads beautifully on camera regardless of lighting setup. Nail techs who post milky nail content frequently report significant spikes in same-week booking inquiries. For salon owners, stocking a high-performing milky white is not just about serving current clients, it is about being findable when new clients search for the look they just saw online. The Three-Look System: How to Get Maximum Value From One Bottle This is the technical detail that separates LG5001 Lactose Intolerant from standard white gel polish, and the information nail techs need to communicate to clients when offering the shade as a menu option. Coats Look Visual Effect Best For 1 coat Sheer Jelly Translucent veil - nail bed visible through the color, glass-like finish Jelly nails look, soap nails trend, minimalist summer manicure 2 coats Classic Milky White Soft, creamy milky finish - nail bed barely visible, warm white tone Clean girl aesthetic, Old Money look, bridal nails, everyday wear 3 coats Near-Opaque White Full coverage without chalky flatness - retains the soft warmth of the formula Clients who want white nails without harsh contrast For salon menus, this versatility is a practical selling point. Instead of stocking separate SKUs for jelly nails, milky nails, and soft white nails, three different client requests, LG5001 Lactose Intolerant covers all three. The only variable is the number of coats applied. Understanding the Color: What "Sheer Milky White" Actually Looks Like The word 'white' in nail polish covers a wide range of actual colors, from bright stark white to warm cream to barely-there sheer. Understanding where LG5001 Lactose Intolerant sits in that range is essential for setting correct client expectations. Not a True White LG5001 Lactose Intolerant is not the white you get from a French manicure tip. It is warmer and softer, closer to the color of milk or cream than to a bright white wall. This warmth is intentional. Stark whites can look clinical against skin tones, particularly under artificial light. The milky warmth of LG5001 reads as healthy and natural, which is exactly the response that milky nails clients are looking for. The Nail Bed Interaction Because LG5001 Lactose Intolerant is sheer, the finished look depends partly on the client's natural nail bed color. Clients with a pink nail bed will see a slight warm-pink glow through the milky finish at one to two coats, which actually enhances the look. Clients with a more neutral or yellow nail bed will get a cleaner milky result. This is not a flaw; it is the characteristic that makes sheer formulas feel more natural than opaque ones. Understanding this interaction helps nail techs manage client expectations and explain why two clients with the same product may see slightly different results, both beautiful, but individualized by their own nail bed color. Flattering Across All Skin Tones The milky undertone is carefully balanced between warm and cool, not so pink that it clashes with deeper skin tones, not so yellow that it reads dull on fair skin. Across the full range of client complexions common in U.S. salons, LG5001 Lactose Intolerant creates the visual effect of well-maintained, naturally bright nails rather than a stark color contrast. That quality is why it consistently performs as a crowd-pleaser rather than a niche request. What Clients Actually Experience Wearing LG5001 Lactose Intolerant The "Effortless" Feeling Clients who wear LG5001 Lactose Intolerant for the first time frequently describe the result with the same word: effortless. Not dramatic, not statement-making, effortless. This is a specific emotional response that is harder to achieve than it sounds. A nail color that looks deliberately chosen but never overdone is the product of precise formula calibration. The sheer finish does the work; the client gets the credit. For nail techs, this matters because clients who feel effortlessly put-together in their nails tend to wear the color longer before wanting a change, and they tend to return to the same shade. LG5001 Lactose Intolerant is not a one-time try, it becomes a default for many clients. The Versatility Discovery Most clients book LG5001 Lactose Intolerant because they saw milky white nails somewhere and wanted that specific look. What they discover during the wear cycle is that the color works across more contexts than they expected. It does not conflict with office dress codes. It does not look out of place at weddings, dinners, or casual weekends. It pairs with every clothing color without ever being the wrong choice. That versatility discovery is what converts a first-time booking into a repeat client. When a nail color becomes a reliable default rather than an occasional option, the client stops shopping around. The "My Nails But Better" Effect The most common compliment clients receive while wearing LG5001 Lactose Intolerant is not "I love your nail color", it is "your nails look so nice" or "did you just get a manicure?". The sheer milky finish creates the impression of exceptionally healthy, well-cared-for nails rather than a deliberate color choice. This is the nail equivalent of the best natural makeup, you see the result, not the product. Clients find this deeply satisfying because the compliment is about them, not just their manicure. LG5001 Lactose Intolerant as a Nail Art Base: A Tool for Nail Techs Beyond wearing it as a standalone color, LG5001 Lactose Intolerant has become a reliable base layer for nail art applications. The sheer milky finish creates a specific visual foundation that enhances certain art techniques. Ombre and Gradient Base LG5001 Lactose Intolerant's sheer quality makes it the ideal starting point for gradient nail art. Because the base is translucent rather than opaque, gradient transitions, particularly from milky white into soft pink, lavender, or nude, blend more naturally than they would over a full-coverage base. The nail bed shows through slightly at the lighter end of the gradient, creating depth that a flat opaque base cannot replicate. Minimalist Nail Art Canvas Single-color stamping, micro floral details, and French tip variations all sit cleanly on top of a cured LG5001 Lactose Intolerant base. The warmth of the milky white background makes gold and silver detail work particularly striking without competing with the art. Nail techs who post minimalist nail art on a milky white base consistently find that this style photographs exceptionally well, the contrast between the soft base and the precise detail is both visually clean and algorithmically rewarded. Ombre French Tip Starting Point LG5001 Lactose Intolerant base under a soft ombre French tip, where the white tip fades into the milky base rather than stopping at a hard line, is one of the most requested looks in salons that carry this shade. The soft transition is nearly impossible to achieve with two opaque whites because the formulas do not blend. With LG5001 Lactose Intolerant as the base, the tip can feather naturally into the background. Application Guide: How to Get Clean Results With a Sheer Formula Sheer formulas require slightly different handling than opaque gels. The translucency that makes LG5001 Lactose Intolerant versatile also means prep work and layering technique matter more. Prep Is the Foundation Because LG5001 Lactose Intolerant allows the nail bed to show through, any uneven surface work on the nail plate becomes visible in the finished color. Use a fine-grit nail drill bit to ensure a completely smooth, uniform nail surface before application. Remove all oil residue, a dehydration step is essential because any oil contamination will show as a subtle cloudiness under the sheer milky finish. Thin Coats, Decide Your Look First Before applying the first coat, know which look you are building toward: Jelly / Soap Nails: One thin coat. Cure fully. Top coat immediately. Classic Milky White: Two thin coats with a full cure between each. The second coat closes the translucency to the classic milky finish. Near-Opaque White: Three thin coats with full cures. Check coverage after each coat, some nail bed colors achieve the near-opaque look in 2.5 coats. The key in all three cases is thin coats. A thick coat of sheer gel creates uneven coverage with visible brush marks. Thin coats build smoothly and cure evenly. Top Coat Finish Options High-Gloss Top Coat: Enhances the glass-like quality of the milky finish. The standard choice for the jelly and milky white looks. Matte Top Coat: Creates a soft, powdery finish that reads as a sophisticated alternative to the gloss. Works particularly well at two and three coats where there is enough coverage to carry the matte effect. Where to Buy Authentic Chaun Legend LG5001 Lactose Intolerant Sheer formulas are particularly sensitive to storage conditions. Improper temperature exposure can alter the viscosity of a sheer gel, making it either too runny (which destroys coverage control) or too thick (which makes thin application impossible). Purchasing through an authorized distributor ensures the formula is intact. DTK Nail Supply is an authorized U.S. distributor of Chaun Legend products. LG5001 Lactose Intolerant is available for individual purchase or salon-quantity orders with wholesale pricing options. Shipping: Free on orders $100+. Free tax on all orders. Free gifts starting at $35. The Bottom Line LG5001 Lactose Intolerant is not a trend product. It is a technically versatile sheer white that answers three different client requests, jelly nails, milky nails, near-opaque white, from a single bottle. For nail techs building a tight, efficient color wall, this kind of multi-function shade is exactly what justifies shelf space. Stock it. Learn the three-coat system. Show clients all three options at consultation. The upsell writes itself. Ready to add LG5001 Lactose Intolerant to your salon menu? Shop Chaun Legend LG5001 at DTK Nail Supply, authorized U.S. distributor with free shipping on orders $100+.
Read more
How Much to Charge for Builder Gel: A Pricing Playbook
Builder Gel full set pricing in 2026 ranges from approximately $45 to $80+ depending on salon location and length, with major US metros reaching $100+ for sculpted sets. Unlike acrylic, Builder Gel fills often cost the same or more than full sets because apex rebalancing takes equal time. Use 5 pricing models, flat, length-based, complexity, time-based, package, to capture the full margin potential. Builder Gel is the highest-margin nail service most salons offer, and the one most salons price wrong. Treating it like a slightly more expensive gel manicure leaves real money on the table. Pricing it like acrylic, where fills are cheaper than full sets, actively hurts your margin because Builder Gel fills do not work the same way. This playbook covers the five pricing models that work for Builder Gel, the full-set-versus-fill pricing gap most salons get wrong, the add-on stack where real Builder Gel margin lives, and a sample 3-tier menu you can adapt. For general nail service pricing across your full menu, see How to Price Nail Services - this article zooms in specifically on Builder Gel. 1. Why Builder Gel Pricing Deserves Its Own Strategy Builder Gel sits in a unique position on a salon menu. It is not regular gel polish (durability is 3-5 weeks vs 1-2 weeks), and it is not acrylic (no monomer odor, no full removal cycle). That positioning has three direct pricing implications: Recurring revenue, not one-off: Industry sources commonly cite a 2-3 week fill cycle for BIAB, though LAVIS Builder Gel users report up to 4 weeks of wear. Either way, the client returns predictably, meaning each client booking turns into 12-17 recurring services per year. Fills do not work like acrylic fills: A Builder Gel fill requires color removal, apex rebalancing, and gel reapplication, often taking equal or more time than a full set. Several US salon menus we reviewed, actually charge slightly more for the fill than the full set. Add-on stacking is where the real margin lives. Builder Gel can serve as a base for nail color, Cat Eye, chrome, French, and nail art, each adding $5-$50+ per service with very little incremental product cost. 2. The 5 Builder Gel Pricing Models Most salons default to a single flat price for Builder Gel. The salons capturing the most margin use 2-3 of the following models in combination: Model 1: Flat Price One price for all Builder Gel full sets regardless of length, color, or art. Simplest to communicate. Works best for new salons still building Builder Gel as a category. Trade-off: undercharges complex services and over-prices simple ones. Model 2: Length-Based Tiers Short / medium / long pricing, most common upgrade from flat pricing. Industry approach: starting price for short, +$10-$15 per length tier (approximately, varies by salon location). Captures the longer service time longer nails require without complicated math at checkout. Model 3: Complexity-Based Solid color / French / nail art / sculpted apex priced separately. Real salon menus we reviewed structure this as base service price + add-on per nail (e.g., +$2.50 per nail for designs). Best for salons where Builder Gel is the bulk of revenue and clients regularly add custom designs. Model 4: Time-Based Services lasting 90+ minutes priced by the half hour rather than flat menu rate. Industry pricing experts suggest hourly anchors of $60-$90/hour for skilled gel work (approximately, varies by salon location). Best for high-skill techs offering bespoke or extended Builder Gel sets where flat pricing under-rewards their time. Model 5: Package Pricing 3-visit or 6-visit Builder Gel packages paid up front, priced at a slight discount versus paying per visit. Captures cash flow up front, locks in the client for 9-18 weeks, and improves rebook rates. Best applied to maintenance fill cycles, not new-client introductory pricing. 3. Full Set vs Fill: The Pricing Gap Most Salons Get Wrong This is the single biggest Builder Gel pricing mistake we see. Salons import acrylic logic "fill is cheaper than full set" and apply it to Builder Gel, where the time math actually runs in the opposite direction. Real US salon menu examples (USD, varies by location): Salon Example Full Set Fill Envy Salon (US glossgenius) $52+ (90 min) $55+ (90 min) Nails By Khristy LLC $70+ (70+ min) $75+ (60+ min) Nails By Gia $70+ (75 min) $60+ (75 min) The data shows what experienced nail techs already know: Builder Gel fills include color removal, apex rebalancing, and full gel reapplication, work that often takes equal or more time than a full set. Pricing a Builder Gel fill at 60-70% of full set (the acrylic convention) effectively means doing the same work for less money. Pricing principle: Price Builder Gel fills at minimum 100% of full set pricing. Some salons charge 105-115% to reflect the apex rebalance work, plus an additional fee per nail for design changes. This protects margin and discourages clients from claiming fill when a full set is actually needed. 4. The Add-On Stack: Where Builder Gel Margin Lives Once a client is in the chair for Builder Gel, add-ons are nearly pure margin, your product cost is negligible, the only added cost is time. The add-ons most consistently profitable to stack on a Builder Gel base: Add-On Typical Charge Gel polish color over BIAB +$5-$10 French tip / ombre +$10-$20 Cat Eye overlay +$10-$20 Chrome / aurora finish +$10-$25 Nail art (per nail) +$2.50-$5+ per nail Sculpted length (apex extension) +$20-$30+ Add-on pricing data above is drawn from real US salon menus we reviewed; exact figures vary by salon location and tech experience. The salons doing this best have an add-on menu visible at every station so techs are reminded to mention them during prep. 5. Fill Schedule Economics: 3 Weeks vs 4 Weeks Your fill schedule is a pricing decision as much as a service decision. Industry standard for BIAB is 2-3 weeks; LAVIS Builder Gel users report sustaining wear up to 4 weeks. Each interval has a different annual revenue profile per client: Assume a $65 fill price (approximately, varies by salon location): Fill Interval Fills Per Year Annual Revenue / Client 2 weeks ~26 ~$1,690 3 weeks ~17 ~$1,105 4 weeks ~13 ~$845 Shorter fill intervals look more profitable on paper, but they also burn through more chair time per client per year and risk client fatigue. The salons we work with optimize for a 3-week cycle as the practical sweet spot: enough recurring revenue to compound, infrequent enough that clients do not feel they are constantly in the salon. 6. Builder Gel vs Acrylic: Margin Per Hour Matters More Than Margin Per Bottle Many salons compare Builder Gel and acrylic at the product cost level and conclude acrylic is cheaper. That comparison misses the real economic picture, which is margin per chair-hour rather than margin per service: Service time: Industry sources cite Builder Gel full sets taking approximately 70-120 minutes; acrylic full sets typically run 90-150 minutes depending on technique. Builder Gel runs faster end-to-end for most techs. Tech comfort: Builder Gel has no monomer odor, meaning techs sustain longer days without the headaches and respiratory fatigue acrylic causes. Higher daily output per tech is direct margin. Removal cycle: Builder Gel does not require full removal at each fill, only lifted areas are addressed. This shortens fill time and protects the natural nail. Client tolerance for higher price: Builder Gel commands premium pricing because clients perceive it as the modern, cleaner alternative, even when the base technique is similar to acrylic. Bottom line: even if acrylic product cost is lower per service, Builder Gel typically produces a higher chair-hour margin when you account for service time, repeat cycle, and add-on stacking. 7. Sample 3-Tier Builder Gel Menu A starting framework adaptable to your local market. Adjust the dollar values based on your geography (approximately, varies by salon location, major US metros price 20-30% higher than mid-market): Tier Full Set Price Fill Price Best For Entry - Natural Overlay $45-$55 $45-$55 Solid color, no length added, clean-girl clients Standard - Full Service $60-$75 $60-$80 Includes color, light French, basic art, medium length Premium - Sculpted / Custom $85–$120+ $85–$120+ Sculpted length, Cat Eye, chrome, custom art The sample tiers above are starting points. The salons most successful with Builder Gel pricing review their menu every 12-18 months and raise rates 5-10% per cycle to stay aligned with rising supply costs and local market shifts.
Read more
Mastering Acrylic Powder Ratios for Perfect Consistency
The ideal acrylic nail ratio is 1 part liquid monomer to 1.5 parts acrylic powder. This creates a medium bead — pliable, self-leveling, and easy to mold without running into cuticles. Too wet causes lifting and weak nails. Too dry causes brittleness and air bubbles. Odorless systems require a drier 1:1 ratio. If you've ever had acrylic run into a client's cuticles, set up before you could shape it, or come out frosty and brittle, the ratio was off. Not the brand. Not the brush. The ratio. Liquid-to-powder ratio is the single most technical skill in acrylic application, and also the most commonly misunderstood. Most nail techs learn it by feel over years of practice. This guide makes that process faster by giving you the exact ratios, the visual cues for each bead type, and a troubleshooting system for when something goes wrong. "It bonds well with the nail and keeps acrylics from lifting, even after several weeks." - Nail tech, Kiara Sky Monomer review That kind of result, clean adhesion, no lifting after weeks, isn't just about monomer quality. It's about using the right amount of it. Here's how. The Chemistry Behind the Ratio (60-Second Version) When liquid monomer meets acrylic powder, a chemical process called polymerization begins. The monomer molecules link together around the powder particles and harden into a single solid unit, your acrylic nail. The ratio controls how completely that reaction happens: Too much liquid: Excess monomer has nothing to bond to. It stays uncured in the enhancement, creating a weak, porous structure that lifts, and can cause allergic reactions from prolonged uncured monomer contact with the skin. Too much powder: Not enough monomer to bond all the powder particles together. The nail cures brittle, prone to cracking, and full of micro air pockets. Correct ratio: Every powder particle is surrounded by just enough monomer to polymerize completely, resulting in a dense, strong, flexible enhancement. This is why ratio isn't just about workability. It directly determines how long the set lasts, how strong it is, and whether your client develops a sensitivity reaction over time. The Standard Ratio and What It Looks Like The industry standard for most traditional acrylic systems is 1 part liquid monomer to 1.5 parts acrylic powder. This balance produces a bead that is pliable, dough-like, and easy to mold without running into the cuticle area or setting too quickly to shape. In practice, you don't measure by volume, you control ratio through how much liquid you leave on your brush before picking up powder. The more liquid on the brush, the wetter the bead. The more you wipe off, the drier it becomes. Brush Control Method 1. Fully saturate your brush in the dappen dish, let air bubbles stop coming out. 2. Wipe ONE side of the brush against the inside edge of the dish to remove excess liquid. 3. Touch the tip of your brush to the powder, let the liquid draw the powder in. Don't scoop. 4. Count 2-3 seconds before lifting to let the bead form fully. The amount of liquid removed in step 2 determines bead size and ratio. More wiped off = drier bead. Less wiped = wetter bead. The test for a correct standard bead: place it on a nail tip. A properly mixed medium bead will flow slowly after 10-15 seconds, hold its dome shape, and show no pool of liquid around the base. If it flattens or flows in 3-4 seconds, it's too wet. The Three Bead Types: When to Use Each Ratio isn't one-size-fits-all. Different areas of the nail require different bead consistencies. Most professional application uses a three-bead method, each mixed to a different ratio for a specific zone. Small Bead: Wet Consistency Ratio: 3 parts monomer : 1 part powder Appearance: Glossy, almost transparent, flows readily. No dry powder visible on outside. Use for: Cuticle area and sidewalls only. Thin coverage, easy to blend into the natural nail edge without bulk. Never use a wet bead on the stress zone, it won't hold structure. Medium Bead: Standard Consistency Ratio: 1.5 parts monomer : 1 part powder (the standard ratio) Appearance: Soft, fluffy, round pearl shape. Slightly glossy. Self-levels slowly when placed. Holds dome shape without running. Use for: The workhorse bead. Used for the majority of every set - general sculpting, building the nail body, stress area, and apex placement. Large Bead: Dry Consistency Ratio: 1 part monomer : 3 parts powder Appearance: Dry and powdery-looking on the outside, but liquid inside. Matte appearance. Holds shape immediately on pickup. Use for: Large surface coverage, free edge extension, or one-bead technique. This drier bead gives maximum control over shaping before it sets. The key principle: wet beads at the cuticle prevent bulk and lifting. Drier beads at the free edge give you the control and strength needed for extension work. Using a wet bead near the extension tip is the most common beginner mistake. How to Read Your Bead Before You Place It An experienced nail tech looks at the bead on the brush tip for 2-3 seconds before placing it. Here's what each appearance tells you: Bead Appearance on Brush What It Means What to Do Very shiny, almost dripping, flows off brush Too wet, excess monomer Wipe more liquid from brush before next pickup Round, slightly glossy, holds shape Correct medium consistency ✅ Place it, this is the target Satin finish, domed, not too shiny or dull Correct for sculpting ✅ Place and shape with confidence Dry powder coating on outside, matte Dry bead — intentional Use for free edge or extensions only Crumbly, falls apart on pickup Too dry — not enough monomer Load more liquid on brush before next try Taffy-pull when brush lifts away Bead is starting to set Wipe brush; work faster on the next bead The 10–15 Second Test Place a bead on a clean nail tip. Watch it for 15 seconds: Correct: Flows slowly, holds dome shape, no liquid pool around base. Too wet: Flattens within 3-4 seconds, or a liquid ring forms around the base. Too dry: Doesn't move at all. Stays stiff. Powdery edges visible. Run this test when switching products, working in a new environment, or after any consistency issues in your last set. It takes 30 seconds. Troubleshooting: Diagnosing Ratio Problems Mid-Set These are the five most common ratio-related problems and exactly what's causing each one: Problem Root Cause What's Happening Fix Acrylic runs into cuticles Bead too wet Excess monomer reduces surface tension, product flows instead of holding position Wipe more liquid from brush. The cuticle bead should be medium-wet at most, never runny. Lifting within 1-2 weeks Bead too wet Excess monomer doesn't fully polymerize, leaves uncured zones that break the adhesive bond Dry your beads down. If liquid pools around the bead base when placed, the ratio is off. Frosty or cloudy finish after curing Bead too wet, crystallization Over-saturated monomer rises to the surface during cure and crystallizes as a white haze Reduce liquid on brush. Frosty finish is visible proof the ratio was off. Nails brittle, cracking within days Bead too dry Insufficient monomer means powder particles aren't fully bonded, gaps in the polymer chain create weakness Add more liquid to your brush. Check: are you using odorless monomer? It requires a drier ratio. Air bubbles in finished nail Too wet or too dry, plus rushing Bubbles form when bead is trapped mid-flow (too wet) or when a dry bead doesn't press flat Use a medium bead and press down firmly. Never re-dip brush in monomer mid-nail to smooth. Odorless Acrylic: The Ratio Is Different If you're using an odorless acrylic system and getting brittle, cloudy results with normal technique, the ratio is the issue. Odorless monomers require a significantly drier mix than traditional EMA-based systems. The recommended ratio for most odorless systems is 1:1 monomer to powder, never more liquid than powder. This produces a bead that looks almost frosty and feels stiff. That's correct. Why Odorless Needs a Drier Ratio Odorless monomers use a modified formula that reduces vapor. The tradeoff: the product doesn't evaporate the way traditional monomer does, so it stays wetter longer on the nail. Using a wet bead with odorless monomer means excess liquid never properly evaporates, it stays trapped, causing a tacky finish, crystallization, or sensitization over time. The technique adjustment: place the bead, let it 'wet out' on the nail surface, then shape. You have more working time than you think. Resist the urge to add more liquid. How Temperature and Humidity Affect Your Ratio Your ratio doesn't change, but its effect does, depending on your environment. This is why a ratio that works perfectly in winter can cause lifting problems in summer. Environment Effect on Acrylic Adjustment Hot room / summer Monomer evaporates faster; beads set more quickly; working time shortens Use slightly wetter beads. Work faster. Consider a slower-setting monomer. Cold room / winter Monomer sets more slowly; beads stay workable longer; risk of over-wetting Use slightly drier beads. Warm the monomer bottle in your hands before use (not direct heat). High humidity Cure slows down; bead stays tacky longer; powder can absorb moisture from air Use a drier bead. Keep the powder lid on between uses. Ensure salon ventilation. Low humidity (dry climate) Monomer evaporates faster off the brush, bead may be drier than expected Leave slightly more liquid on brush. Cover the dappen dish between pickups. Why Product Quality Changes Everything The ratio guide above assumes you're working with a quality EMA-based monomer. With degraded or mismatched products, no ratio will give you consistent results. "Perfect for My Acrylics. Very Satisfied!" - Nail tech, Kiara Sky Monomer "CHAUN LEGEND COVER ACRYLIC AND EMA MONOMER IS TOO NICE!" - Nail tech, Chaun Legend Monomer Both are EMA-based monomers available at DTK Nail Supply. When your monomer is the right formula and fresh, ratio control becomes the only variable. Three rules that directly affect your ratio behavior: Never mix brands without testing: Different powders contain different initiator levels, mismatched systems create inconsistent cure behavior that feels like a ratio problem but isn't. Replace monomer every 6-12 months after opening: Old or contaminated monomer behaves differently and can slow polymerization regardless of your technique. Use fresh monomer in the dappen dish each session: Powder residue in the dish changes the monomer chemistry. Pour fresh liquid every time. The Fastest Way to Master Ratio: Deliberate Practice There's no shortcut, but there is a faster path than hoping it clicks over hundreds of client sets: Practice on a tip board, not a client: Get 20 nail tips. Pick up beads with different amounts of liquid, observe the differences in appearance, working time, and finish. No stakes, pure learning. Use the count method: Count how long your brush is in the liquid, then in the powder. Find the count that produces the consistency you want and repeat it. Consistency of technique produces consistency of ratio. Run the 10-15 second test every 10 minutes during your first sessions with a new product. It trains your eye faster than anything else. Vary the environment intentionally: Practice in a warm room, a cold room, with high humidity. Know how your system behaves before a client experiences it. Use a matched system: Kiara Sky monomer with Kiara Sky powder, Chaun Legend monomer with Chaun Legend powder, formulated together, so ratio, cure time, and bead behavior are already tuned as a unit. Beginner Shortcut: Start with the Medium Bead Don't try to perfect all three bead types at once. The medium bead (1:1.5 ratio) covers 70–80% of every set. Master it until it's automatic, the right appearance, the right feel, the right working time, before adding the small wet bead and large dry bead to your muscle memory. Most lifting problems in beginner acrylic work come from accidentally using a medium-wet bead in the cuticle area. Getting the medium bead consistent first eliminates that variable entirely. Consistency Is the Skill Ratio mastery isn't about memorizing a number, it's about training your hands and eyes to produce the same bead every time, across different environments, products, and nail types. The 1:1.5 standard gives you a target. The visual cues, the 10-15 second test, and deliberate practice give you the path to hit it consistently. One last thing worth noting: if you've been fighting ratio problems for a long time and nothing is working, check the product before the technique. A quality EMA monomer that's fresh, stored correctly, and matched to your powder is dramatically easier to work with than even the best technique applied to a compromised product. Shop at DTK Nail Supply Shop professional acrylic products at DTK Nail Supply: → Kiara Sky EMA Monomer — consistent ratio behavior, anti-lifting performance → Chaun Legend EMA Monomer — salon favorite among US nail techs → Acrylic Powder (Pink, White, Clear) — matched systems for predictable results → Dappen Dishes + Acrylic Brushes — the right tools for ratio control dtknailsupply.com · Free shipping on orders $100+ See Next: This article is part of DTK Nail Supply's Acrylic nail education series. Acrylic vs Gel Nails — Which Is Better for Your Salon How to safely remove acrylic nails The 5 Best Alternatives to Acrylic Nails That Are Safer & Better
Read more